Sewing Room Dropcam

Sunday, February 19, 2012

Need a bigger design wall!

Next time I'm at a department store I'll look for a big vinyl table cloth with a flannel backing.  I read that they're great for a design wall. 


I haven't sewn the outer points to the center and I'm kind of waiting on delivery of a circle ruler that goes up to 17", which is exactly the unfinished size that the center needs to be.  I've been reading the forum for this BOM and people have had problems with the center being too small so I didn't trim the dark blue outside ring to the trim line yet.

The star points have more of a green look than I intended it too.  The green points exactly match the green in the darker points that also have turquoise blue, which is the color of the dark frame.  It just really has an overall GREEN look.  I guess I posted about that already too!!  I can live with it and the next section that has a dark frame will be in the dark blue of the center so maybe it will all balance out.

Friday, February 10, 2012

Little progress

Haven't done anything on this for a few days, been too tired after work and now I have to work late tonight and this weekend.  :-(

I'm wondering though if there is too much green, not enough blue, in this section.  Maybe I should keep the green/blue dark print but change the lighter green to a blue.  The outside fabric looks very green but it's actually a dark turquoise. 

The second picture is more true to color than the first.  It's funny how things can look so different in pictures.  On the first picture the 1/4 circle is the same fabric as the light small circles but it doesn't look like it is.  One looks white and the other looks green!


Wednesday, February 8, 2012

The Quilt Show BOM January is done

Love how this is coming out!  And I'm sure glad that I didn't trim the dark blue ring on the outer edge before putting it all together.  It's a little off, a little smaller than it should be if I had trimmed it.  I think the bulk of the stabalizer is the main cause of that since it is sewn on the lines.  I tried a little bit to tear the stabalizer off of the center star in the seam area but it's not easily torn like paper.  I'll try again since I'm not sure that I want to quilt through it and the seams are pretty bulky.


 Started on the February pieces last night.  I think I got all of the points printed that I need but the printer ate some pieces so I need to check that I re-printed everything that I needed to.  I am using a LARGE roll of freezer paper so I have to cut 8.5" x 11" pieces for the printer.  What a pain!!  I ordered two 50 count packages of pre-cut printer sized last night since there is A LOT of printing to do.  Those should be delivered Friday from Amazon so I can work on it over the weekend.


Trying out colors to use for the blanket stitch applique of the points.  All those green threads look the same in this picture but they're not.  The darkest green in the large spool looks to be the best.  That is So Fine! from Superior Threads so will use two strands of it.  I used Sharon Schamber's technique of putting the freezer paper pieces on the right side of the fabric, cutting the shape, then glueing the wrong side to the background with Liquid Stitch before removing the paper.  It is pretty quick and easy and it sticks so well that when I had to remove the bottom 1/4 circle that I messed up on, the piece tore in half.

Monday, February 6, 2012

The Quilt Show BOM started

I received the fabric that I ordered for the BOM last week and got it washed and dried so I was able to work on it over the weekend!  I'm using Ricky Tims Stable Stuff and it's really not that hard of a pattern to do with paper piecing.  The trickiest part was sewing the dark blue outer ring to the inner ring but with careful clipping and pinning it's just the awkwardness of sewing a circle.  I haven't sewn the center star to the first border yet but I don't expect it to be any different (knock on wood).

I don't like iron-on applique so I used Perfect Circles to make the 1 1/4" circles and the large center circle.  After doing a couple of them with the gathering stitches by hand I switched to the sewing machine and a 3.0 stitch.  Just gather them around the Perfect Circle, press, spritz with starch, press, and remove the circle.  Used a tiny blanket stitch to sew them on.

The outer points don't get sewn on until they're combined with the February pieces.

Wednesday, January 25, 2012

Ordered Fabric for the Sedona Star

I got out the fabrics that I have and other than 8 yards each of the seafoam green and the palest, water color blue, I only have about a yard each, give or take.  So... shopping I went!  First stop was one of my favorite online fabric shops, Thousands Of Bolts.

I got 19 yards of fabric for $102, and that's including shipping!  Quality fabric too, even some Jinny Beyer.

I tried to kind of match the tones of what I already have so that I can mix and match, add some interest instead of every element being the same.  On the left are the fabrics I have and on the right is what I got to mix with it.

It will be another week before I can start on this and I also ordered some Ricky Tims' Stable Stuff.  Want to try that for the foundation and the applique.

Tuesday, January 24, 2012

The Quilt Show BOM 2012

The Quilt Show BOM this year is beautiful!  I have looked at it several times and I didn't like the colorway of either of the examples and just wasn't in the mood to figure up something different.  Today I saw that they have a blank one to color in yourself.  I wish it was in EQ but I did a screen shot of it and opened it in MS Paint.  I copied in pictures of some Hoffman fabric that I have for another project that I just can't get into and used the eye dropper tool to pick up the color and filled in the picture.


Now to figure up if I have enough of each fabric.  If I'm going to do this I need to start now, hate when I'm so behind on a BOM.

Friday, January 20, 2012

Quilt done and off the frame

It took a few days to do this one as I was only doing a few rows per night but it's done and ready to bind and wash.  I'm almost positive that I have some of the border fabric left to use for the binding but I might have to dig for it.  I boxed up a bunch of scraps and stray jelly roll strips recently trying to get things cleaned up and organized in the sewing room.


My cat perched on the highest spot in the room (except for the top of the refridgerator).  She's sitting on the boxes for the two laser levels I got to help in squaring up quilts.

Monday, January 16, 2012

An older top getting done

I made this quilt top probably in 2009 and I started hand quilting it.  I just don't want to do the hand quilting so I ripped out the 1/3rd or so that I had done and put it on the frame.

After thinking and drawing for days I finally decided to just do a panto on it.  It wasn't going to show a whole lot of the quilting anyway and at least it will get done quickly.


I finally got a zero center tape and it's very helpful in keeping the quilt straight in the center and on the ends.  This is the best loaded quilt I think I've done and the panto is going just right.

Today I ordered some stick on velcro and some elastic to make secondary leaders and side clamps ala Sharon Schamber. 

Also threw in a Easy Dresden ruler and a Prairie Pointer pressing tool.  Can never have too many gadgets.

Monday, January 9, 2012

It's D-O-N-E

Washed, layed out and pinned square, dried, trimmed, and BOUND!


Thursday, January 5, 2012

Vintage quilt is done

All but the washing, blocking, and binding.  I say that like it's nothing but that's still a bit of work to do.
This is the most quilting I've done on one quilt yet and the first time I've done quilting around applique.  I am pretty happy with it though my perfectionist bent leaves me knowing that it could be better.  I found that I actually liked the stitch-in-the-ditch more than the freehand work.  Maybe that is a good thing for me because I admire the quilts I see that are done so well with ruler work and such perfection.

Tin Lizzie finally came out with a 1/4" foot!  I kind of assumed that the foot I had was 1/4" but using a ruler showed me that it wasn't, it's smaller.  That was a bit of a challenge doing SID, let me tell you!  I ordered the foot even though it's highway robbery, the price they charge for it.


Wednesday, January 4, 2012

Been a long time

Rather than get into lengthly explanations I'm just going to jump right in. What's been in the works?  Not a whole lot new actually.  I finished the Faceted Jewels quilt and gave it to my daughter for Christmas.  It turned out OK (my longarm quilting needs a lot of practice still) and I love the rich colors in it.  Doesn't it look great on MY bed though??
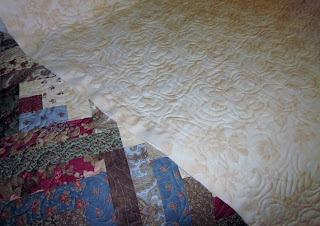
Love the crinkly look after washing.


The Never Ending Quilt top is done too!!


That's the next one to be quilted as soon as I get this one done and off the frame.  Only have the white areas to fill in and the bottom border to do.